
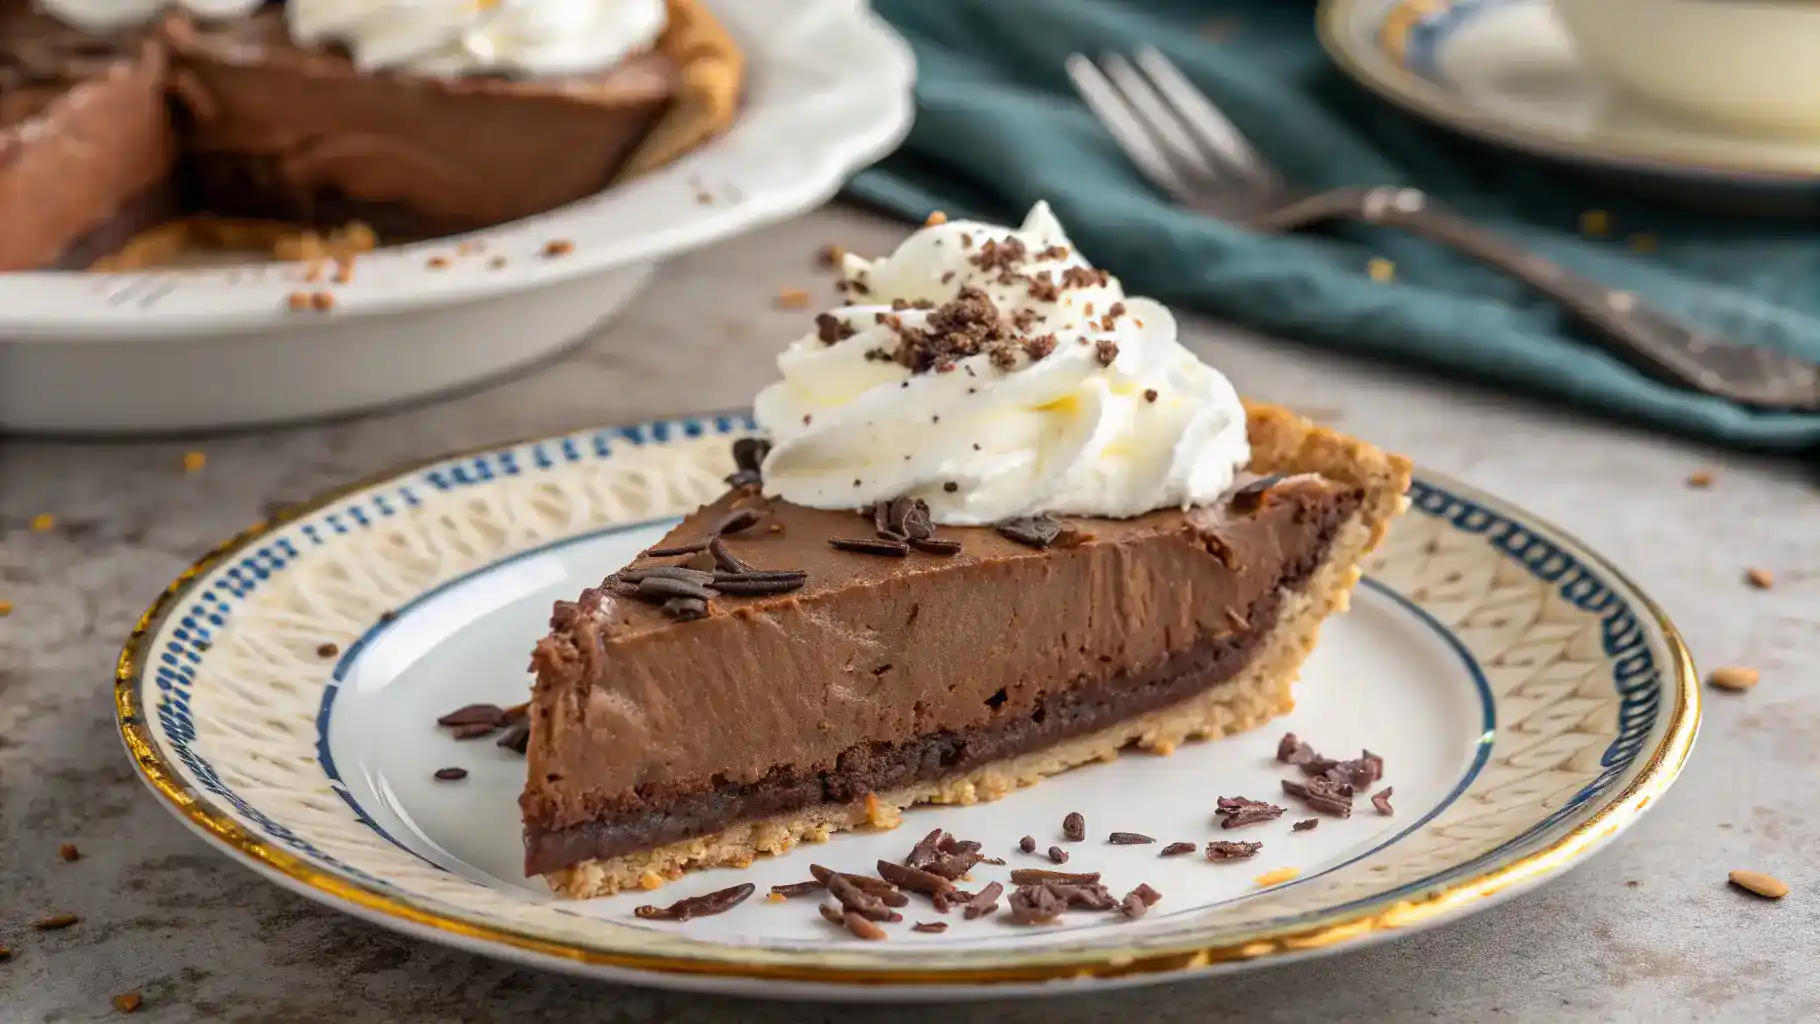
Old Fashioned Chocolate Pie:
Get ready to indulge in a slice of nostalgia with this old fashioned chocolate pie! Rich, velvety chocolate filling nestled in a buttery crust creates a dessert that feels like a warm hug. With simple ingredients like cocoa powder, sugar, and creamy milk, you’ll whip up this delightful treat in no time. Topped with a cloud of whipped cream, each bite is a heavenly experience that will transport you back to cozy family gatherings. Trust me, this pie is not just a dessert; it’s a sweet memory waiting to happen!
Table of Contents
Why You’ll Love This Recipe
- Trust me, you’re going to love this rich, creamy filling that melts in your mouth!
- This one’s a game-changer for chocolate lovers—pure decadence in every bite!
- It’s a nostalgic treat that brings back memories of grandma’s kitchen.
- Simple ingredients mean you can whip it up anytime you need a sweet fix!
- Perfect for any occasion, it’s sure to impress your friends and family!
Recipe Snapshot
| Feature | Details |
|---|---|
| Category: | Dessert |
| Cuisine: | American |
| Prep Time: | 20 minutes |
| Cook Time: | 30 minutes |
| Total Time: | 50 minutes |
| Dietary: | Vegetarian |
| Serves: | 8 |
| Best Served: | Chilled |
Ingredients
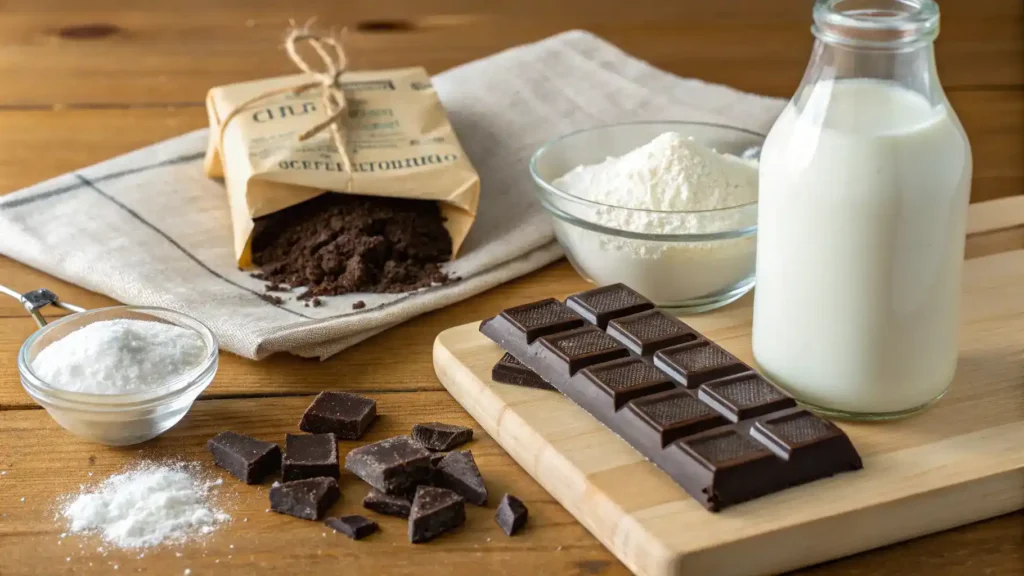
- All-purpose flour – for a tender and flaky crust.
- Granulated sugar – to sweeten the filling perfectly.
- Cocoa powder – for that rich chocolate flavor.
- Salt – enhances the sweetness and balances flavors.
- Butter – adds richness and helps create a flaky crust.
- Eggs – provides structure and creaminess to the filling.
- Milk – for a smooth and creamy texture.
- Vanilla extract – adds a warm, aromatic flavor.
- Heavy cream – for a luscious and decadent topping.
Ingredients with measurements will be right under the article in the recipe card.
How to Make the Recipe
Get ready to whip up a delightful old fashioned chocolate pie that will impress everyone!
Step 1: Gather Your Ingredients
Collect 1 pre-baked pie crust, 1 cup granulated sugar, 1/3 cup unsweetened cocoa powder, 1/4 cup cornstarch, 1/4 teaspoon salt, 2 3/4 cups whole milk, 3 large egg yolks, 2 tablespoons unsalted butter, and 1 teaspoon vanilla extract.
Step 2: Mix the Dry Ingredients
In a medium saucepan, whisk together the sugar, cocoa powder, cornstarch, and salt until well combined.
Step 3: Combine Milk and Egg Yolks
In a separate bowl, whisk the egg yolks and gradually add the milk, mixing until smooth.
Step 4: Heat the Mixture
Slowly pour the milk mixture into the saucepan with the dry ingredients, stirring constantly over medium heat.
Step 5: Thicken the Filling
Keep stirring until the mixture thickens and starts to bubble, about 5-7 minutes.
Step 6: Add Butter and Vanilla
Remove from heat and stir in the butter and vanilla extract until fully melted and combined.
Step 7: Pour into Pie Crust
Carefully pour the chocolate filling into the pre-baked pie crust, smoothing the top with a spatula.
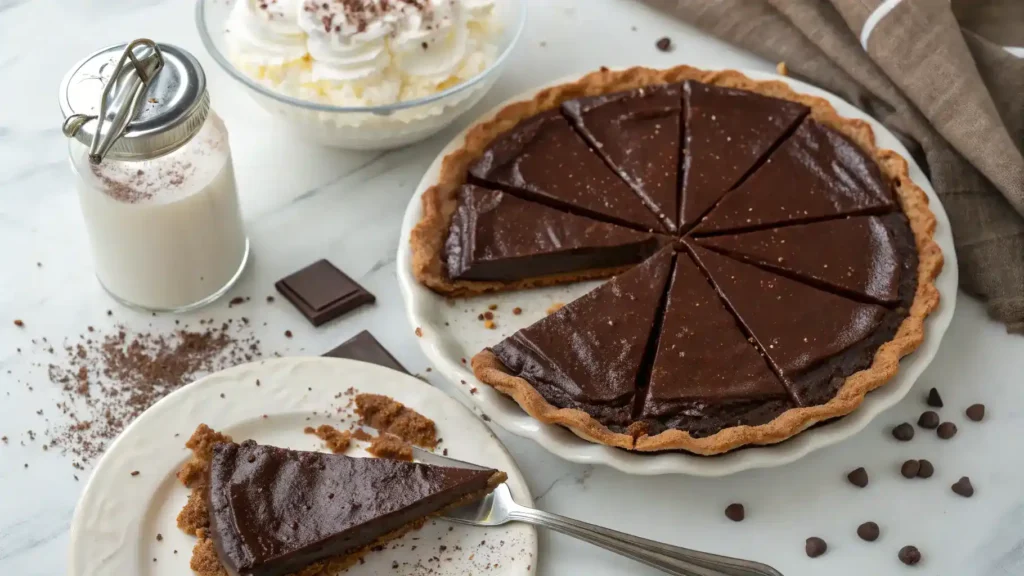
Step 8: Chill the Pie
Cover the pie with plastic wrap and refrigerate for at least 4 hours, or until set.
Step 9: Serve and Enjoy
Slice the pie, serve with whipped cream if desired, and enjoy your delicious creation!
Pro Tips for Making the Recipe
- Use high-quality cocoa powder for a richer chocolate flavor.
- Let the pie cool completely before slicing for cleaner pieces.
- For a creamier filling, consider adding a splash of strong brewed coffee.
- Top with freshly whipped cream for an extra touch of indulgence.
- Chill the pie in the refrigerator for a few hours before serving to enhance the flavors.
How to Serve
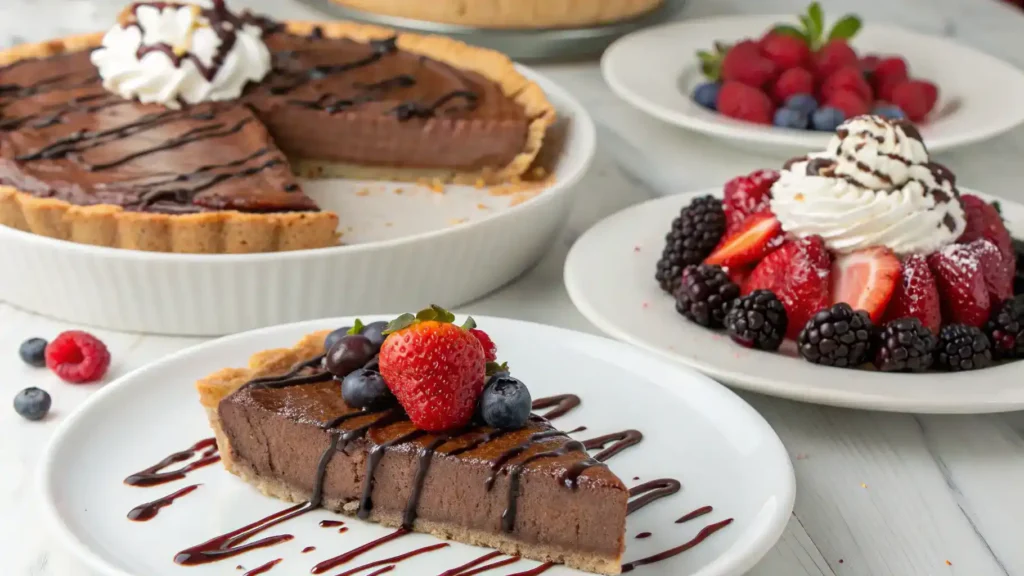
Delight in your old fashioned chocolate pie with these fun serving suggestions:
- Top with a dollop of freshly whipped cream for a light touch.
- Sprinkle shaved chocolate or cocoa powder for an elegant finish.
- Serve with a scoop of vanilla ice cream for a classic combo.
- Add fresh berries like raspberries or strawberries for a fruity contrast.
- Drizzle with chocolate or caramel sauce for extra indulgence.
- Pair with a cup of rich coffee or a creamy hot chocolate for a cozy treat.
- Enjoy with a side of crunchy nuts for added texture.
- Slice and serve with a warm fruit compote for a delightful twist.
Make Ahead and Storage
Storing leftovers is easy and ensures you can enjoy your Old Fashioned Chocolate Pie later.
Storing Leftovers
• Allow the pie to cool completely before storing.
• Cover it tightly with plastic wrap or aluminum foil.
• Store in the refrigerator for up to 3 days.
• For best results, place it in an airtight container.
Freezing
• Slice the pie into individual portions for easy freezing.
• Wrap each slice in plastic wrap, then in aluminum foil.
• Place wrapped slices in a freezer-safe bag or container.
• Freeze for up to 2 months for optimal quality.
Reheating
• Thaw the pie in the refrigerator overnight before reheating.
• Preheat your oven to 350°F (175°C).
• Place the pie on a baking sheet and cover with foil.
• Heat for about 10-15 minutes until warmed through.
How to Serve Old Fashioned Chocolate Pie
Ingredients
Method
- Collect all your ingredients: 1 cup of sugar, 1/3 cup of unsweetened cocoa powder, 1/4 cup of cornstarch, 1/4 teaspoon of salt, 2 3/4 cups of milk, 2 tablespoons of butter, 1 teaspoon of vanilla extract, and a pre-baked pie crust.
- In a medium saucepan, whisk together the sugar, cocoa powder, cornstarch, and salt until well combined.
- Slowly pour in the milk while whisking continuously to avoid lumps. Keep stirring until the mixture is smooth.
- Place the saucepan over medium heat. Stir constantly until the mixture thickens and starts to bubble. This should take about 10 minutes.
- Once thickened, remove from heat. Stir in the butter and vanilla extract until fully melted and combined.
- Carefully pour the chocolate filling into your pre-baked pie crust, spreading it evenly.
- Refrigerate the pie for at least 4 hours, or until set. Patience is key here!
- Slice the pie, serve with whipped cream or chocolate shavings, and enjoy every delicious bite!
Notes
| Nutrient | Amount |
|---|---|
| Calories | 350 |
| Fat | 20g |
| Protein | 5g |
| Carbs | 40g |
FAQs
What can I use as a substitute for eggs in the pie filling?
If you’re looking for an egg substitute, you can use unsweetened applesauce or silken tofu. About 1/4 cup of applesauce or 1/4 cup of blended silken tofu can replace one egg. This will help maintain the creamy texture of your old fashioned chocolate pie.
How can I make the crust from scratch?
Making a homemade pie crust is easier than you think! Combine 1 1/4 cups of all-purpose flour, 1/2 cup of unsalted butter (cold and cubed), and a pinch of salt. Mix until crumbly, then add ice water, one tablespoon at a time, until the dough holds together. Roll it out and fit it into your pie dish!
Can I use a different type of chocolate?
Absolutely! You can use dark chocolate, semi-sweet chocolate, or even milk chocolate depending on your preference. Just keep in mind that the sweetness level will change, so adjust the sugar in the recipe accordingly to achieve your desired taste.
How do I store leftovers?
To store your leftover old fashioned chocolate pie, cover it tightly with plastic wrap or aluminum foil and keep it in the refrigerator. It should stay fresh for about 3-4 days. Just make sure to let it come to room temperature before serving for the best flavor!
Final Thoughts
There you have it—your very own old fashioned chocolate pie! This delightful treat is not just a dessert; it’s a warm hug from the past. So, gather your loved ones, slice up that pie, and watch their faces light up with joy. Remember, it’s simple to make and oh-so-rewarding. Enjoy every bite, and don’t forget to share the love (and the recipe) with friends!
Hungry for more delicious creations? Browse our site for (more recipes) and endless inspiration to spark your next culinary adventure!